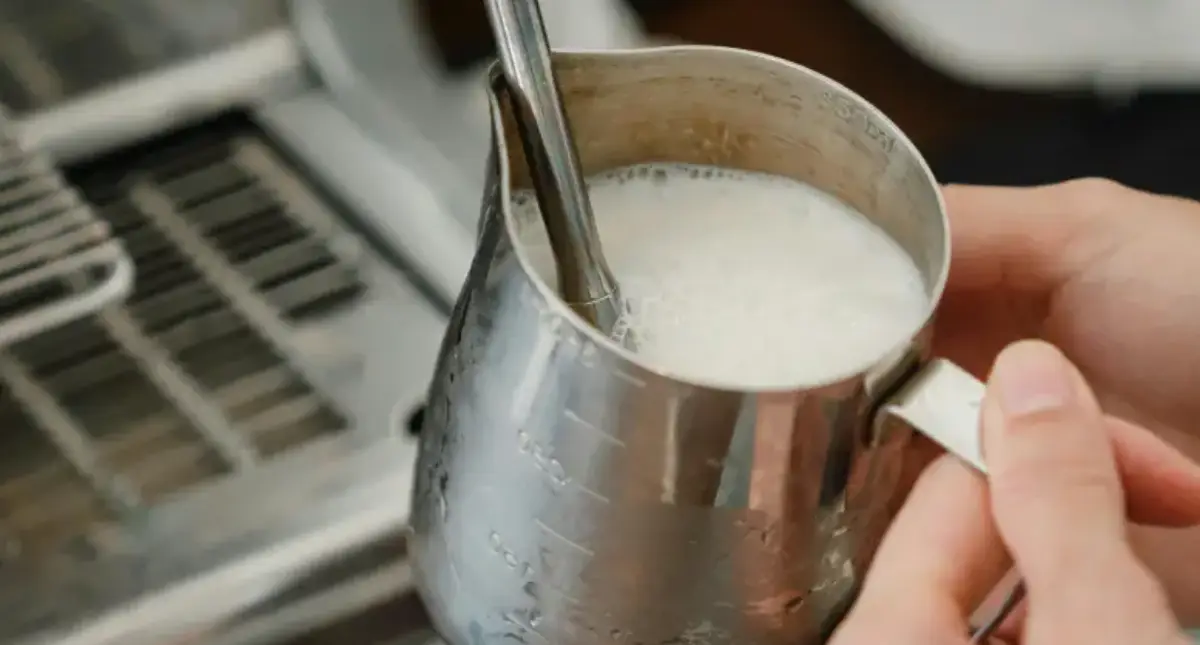
You don’t need a steam wand to make creamy, café-style milk foam. If you want to know how to froth milk at home without a machine or steam wand then all you need is a jar, a French press, a whisk or a $15 handheld frother. These items will get you there in under a minute, using warm milk and a little technique.
- Key Takeaways on How to Froth Milk
- How Milk Froth Works (and Which Milk to Use)
- How to Froth Milk 6 Ways
- Which How To Froth Milk Method Should You Choose?
- Tips for Perfect Froth (and How to Fix Problems)
- What to Make With Your Frothed Milk
- FAQs About How To Froth Milk
- Final Thoughts on How To Froth Milk
- 📌 Related Reads to How to Froth Milk
Frothed milk is what turns a plain coffee into a latte, a cappuccino or a proper hot chocolate. It adds body, a naturally sweet taste and a silky texture without any sugar.
This how to froth milk guide covers six reliable methods, which milks froth best, how to fix common problems, and what to make once you have a jug of foam.
Quick answer: Warm cold milk to 60–65°C (140–150°F), then agitate it with air using a handheld frother (15–30 seconds), a French press (20–30 seconds) or a sealed jar (30–60 seconds). Tap the container on the counter to pop large bubbles, then pour straight away.
Key Takeaways on How to Froth Milk
- Whole milk gives the creamiest, most stable foam. Barista-style oat milk is the best non-dairy option.
- Heat matters: aim for 60–65°C. Above 70°C, milk loses sweetness and the foam turns thin and dry.
- The French press and handheld frother give the finest, most latte-friendly microfoam.
- Froth right before serving, because foam begins to collapse within a few minutes.
- Fresh, cold milk straight from the fridge (before warming) froths better than milk that has sat out.
How Milk Froth Works (and Which Milk to Use)
Froth is simply air trapped in milk. Milk proteins wrap around each air bubble and hold it in place, while fat adds creaminess and weight. That is why the type of milk and its temperature matter as much as the tool you use.
Warming the milk first helps proteins unfold and stabilize bubbles. Overheating does the opposite: above roughly 70°C the proteins break down, the foam gets stiff and dry, and the milk tastes flat. A kitchen thermometer is handy, but if the jug is too hot to hold comfortably for more than a couple of seconds, it is too hot.

Best milks for frothing
| Milk | Foam quality | Notes |
|---|---|---|
| Whole dairy milk | Creamy, stable, rich | Best all-rounder for lattes and cappuccinos |
| 2% / semi-skimmed | Good, slightly lighter | Balanced foam with less richness |
| Skim milk | Big, airy, dry foam | Froths fast but collapses sooner and tastes thinner |
| Barista oat milk | Smooth, close to dairy | Best non-dairy choice for latte art |
| Soy milk | Thick and stable | Can curdle in very hot or acidic coffee, so warm gently |
| Almond milk | Thin, short-lived | Choose a barista blend for any real structure |
| Lactose-free milk | Similar to regular milk | Naturally sweeter, froths well |
For non-dairy milks, “barista edition” cartons are worth the small premium, because they contain added stabilizers and fats designed to hold foam.
How to Froth Milk 6 Ways
1. French Press Method (Best for Microfoam)
The French press is the closest you will get to steam-wand texture, because the mesh filter breaks air into very small bubbles.
- Warm 1 cup (240 ml) of milk on the stove or in the microwave to 60–65°C (140–150°F).
- Pour it into a clean French press, filling it no more than one-third to one-half full, since the milk will roughly double in volume.
- Hold the lid down and pump the plunger up and down quickly for 20–30 seconds, until the milk has doubled and looks glossy.
- Tap the press firmly on the counter two or three times to pop large bubbles.
- Pour over your coffee, spooning out any remaining stiff foam on top.
Pro tip: Keep the mesh just below the surface for the first few pumps, then pump through the full depth to blend the foam in.

2. Jar Method (No Special Equipment)
Perfect when all you have is a jam jar and a microwave.
- Pour warm (not boiling) milk into a clean jar with a tight lid, filling it no more than halfway.
- Screw the lid on tightly and shake hard for 30–60 seconds, until the milk has roughly doubled.
- Remove the lid and microwave for 20–30 seconds. This warms the milk and helps set the foam.
- Tap the jar on the counter, then pour, holding back the foam with a spoon first if you want to layer it on top.
Safety note: Never shake very hot milk in a sealed jar, because the pressure can push the lid off. Use warm milk and wrap the jar in a tea towel. Always take any metal lid off before microwaving.
3. Handheld Milk Frother (Fastest and Easiest)
A battery-powered frother is inexpensive and gives consistent results every time.
- Heat the milk to 60–65°C (140–150°F).
- Pour it into a tall, narrow cup or jug, filling it about halfway.
- Place the whisk head just below the surface and switch it on for 15–30 seconds, then lower it deeper for the last few seconds to blend the foam.
- Tap the cup on the counter and swirl gently before pouring.
This how to froth milk method also makes excellent cold foam: froth cold milk (skim or 2% works well) for 20–30 seconds and spoon it onto iced coffee.
4. Whisking by Hand
Low-tech, but it works if you are patient.
- Warm the milk and pour it into a wide, shallow pot or a large bowl.
- Tilt the pot slightly and whisk quickly in a back-and-forth motion for 1–2 minutes, so the whisk pulls air in at the surface.
- Stop when the milk has visibly thickened and increased in volume.
Best for single servings. For a larger batch, use a balloon whisk and a deep bowl.
5. Blender or Immersion Blender
A good option when you are making several drinks at once.
- Pour warm milk into the blender jug, filling it no more than one-third full. Never fill it with hot milk, because steam can force the lid off.
- Secure the lid firmly, cover it with a tea towel, and blend on medium-high for 30–60 seconds.
- Pour immediately, because blended foam is airy and fades quickly.
With an immersion blender, use a tall jug and keep the blade just under the surface to avoid splashing.
6. AeroPress Method (Surprisingly Effective)
If you own an AeroPress, you already own a milk frother.
- Warm the milk and pour it into a mug or jug.
- Remove the filter cap and insert the plunger part way into the chamber.
- Pump the plunger up and down vigorously in the milk for about 20 seconds.
- Tap and pour.
The result is a fine, stable foam that works well in lattes.
Which How To Froth Milk Method Should You Choose?
| Method | Time | Equipment | Foam style | Best for |
|---|---|---|---|---|
| French press | 20–30 sec | French press | Fine microfoam | Lattes, flat whites, basic latte art |
| Jar | 30–60 sec | Jar with lid | Medium, airy | When you have no gadgets |
| Handheld frother | 15–30 sec | Battery frother | Light to medium | Daily use, cold foam |
| Hand whisk | 1–2 min | Whisk, pot | Light, bubbly | Single servings |
| Blender | 30–60 sec | Blender | Thick, airy | Batches of several drinks |
| AeroPress | 20 sec | AeroPress | Fine, stable | AeroPress owners |
If you want one method to rely on, choose the French press for texture or a handheld frother for speed.
Tips for Perfect Froth (and How to Fix Problems)
- Start with cold, fresh milk. Milk that has just come out of the fridge is at its freshest and holds foam best. Warm it gently to the target temperature, and don’t let it sit out first.
- Hit 60–65°C (140–150°F). This is the sweet spot for sweetness and foam stability.
- Use the right container. A tall, narrow jug or cup keeps the milk in contact with the frother and stops splashing.
- Don’t overfill. Frothing doubles the volume, so fill the container no more than halfway.
- Tap and swirl. Knock the jug on the counter, then swirl it gently. This pops large bubbles and blends foam and liquid into a glossy, paint-like texture.
- Pour straight away. Foam starts separating within a few minutes.
Troubleshooting How to Froth Milk
| Problem | Likely cause | Fix |
|---|---|---|
| Foam collapses quickly | Milk too hot, or not enough agitation | Use cooler milk (60–65°C) and froth a little longer |
| Big, soapy bubbles | Too much air too fast | Keep the frother or plunger just under the surface and finish with a tap and swirl |
| Thin, watery foam | Low-fat or old milk | Switch to fresh whole milk or a barista non-dairy milk |
| Foam is stiff and dry | Overheated or over-frothed | Froth for a shorter time and stop at 65°C |
| Milk curdles in coffee | Hot, acidic coffee meeting cold milk or soy | Warm the milk first and pour slowly |
For latte art, aim for microfoam rather than tall foam. Microfoam looks like wet paint and pours smoothly, whereas stiff foam sits on top like a lid.
What to Make With Your Frothed Milk
- Latte: Pour one or two shots of espresso (or strong coffee) into a mug, add warm milk, and finish with a thin layer of foam.
- Cappuccino: Aim for roughly equal thirds of espresso, warm milk and foam, which is where the thicker, drier foam from a jar or whisk shines.
- Flat white: Use less foam and more silky microfoam from the French press.
- Hot chocolate: Spoon foam over the top for a café-style finish.
- Iced coffee with cold foam: Froth cold milk with a handheld frother and float it on top of a cold brew.
- Matcha or chai latte: Froth oat or whole milk and pour it over your base.
If you want a sweet, milk-free alternative, try making Cuban-style espuma, a creamy espresso foam made without any milk.
FAQs About How To Froth Milk
Can I froth non-dairy milk?
Yes. Oat, soy and almond milk can all be frothed, but barista editions give the best results because they contain stabilizers and added fat. Oat is the closest to dairy, soy is thick and stable, and standard almond milk produces the thinnest foam.
How do I get microfoam for latte art?
Use the French press or a handheld frother, keep the milk at 60–65°C, and froth just until it has increased in volume by about half. Tap the jug firmly on the counter and swirl until the surface looks glossy. Microfoam is about texture, not height.
Why is my froth collapsing?
The milk was probably too hot or not agitated enough. Try slightly cooler milk, froth a few seconds longer, and pour straight away. Skim and low-fat milks also collapse faster.
Can I froth cold milk?
Yes. Cold milk froths well, and it is the base for cold foam on iced drinks. The foam is lighter and less stable than warm foam, but a handheld frother does it in about 20–30 seconds.
Can I froth milk without any equipment?
Yes. Shake warm milk hard in a sealed jar for 30–60 seconds. It is the simplest method, with no tools required.
How long does frothed milk last?
Foam begins separating after a few minutes, so froth right before serving. If you need to, re-froth the milk briefly to bring the foam back.
Do I need to heat the milk first?
Not for foam itself, but warm milk (60–65°C) gives a sweeter, more stable result for hot drinks.
Final Thoughts on How To Froth Milk
You don’t need a steam wand, an espresso machine or a big budget to make café-quality foam at home. Start with fresh whole milk, warm it to 60–65°C, and pick the method that suits your kitchen: a French press for texture, a handheld frother for speed, or a jar when you have nothing else.
Practice the tap-and-swirl finish a few times and your next latte will look and taste like it came from a café.
📌 Related Reads to How to Froth Milk
- 🌀 Tame the Chaos: The Best WDT Tool for Perfect Espresso
- ☕ Decaf vs Regular Coffee: What’s the Real Difference?
- 🍄 Ryze Mushroom Coffee Review – Hype or Health Boost?
- 🥥 Best Coffee Alternatives for Energy & Focus
☕ Just a heads up—this how to froth milk post contains affiliate links. If you buy through them, Frothy Fusion may earn a small commission (at no cost to you). Thanks for supporting our coffee-fueled content!