Becoming a home barista sounds like it needs an expensive machine and years of practice, but the biggest improvements come from a handful of habits.
- Quick Answer: What Does a Home Barista Need?
- Key Takeaways
- Quick Comparison: Home Barista Setups by Level
- What Is a Home Barista?
- Essential Home Barista Equipment
- Coffee Beans and Water: The Foundation of Every Cup
- Grinding and Dialling In Espresso
- How to Pull an Espresso Shot at Home, Step by Step
- Milk Steaming and Milk Coffee Basics
- Common Home Barista Mistakes and How to Fix Them
- Cleaning and Maintaining Your Home Barista Setup
- Home Barista Buying Guide: What to Look For
- Frequently Asked Questions About Being a Home Barista
- How do I become a home barista?
- What equipment do I need to be a home barista?
- How much does a home barista setup cost?
- Is the grinder or the espresso machine more important?
- How long does it take to learn to make good espresso at home?
- What is a good espresso ratio for beginners?
- Can I make espresso without an espresso machine?
- Does Nespresso make real espresso?
- How often should I clean my espresso machine?
- Final Verdict: Your Home Barista Journey Starts Small
- ☕ Essential Home Barista Setup
- ☕ Espresso Basics
- 🧪 Brewing Methods
- 🥛 Milk & Coffee Drinks
- 🛠️ Barista Skills
- What to Read Next
Fresh beans, a decent grinder, accurate measuring and a clean setup matter more than a flashy price tag.
This guide walks you through the equipment you actually need, how to dial in espresso, how to steam milk, and the common mistakes that ruin a good shot. By the end, you’ll know how to brew better coffee at home, like a pro.
Quick Answer: What Does a Home Barista Need?
Quick answer: A home barista makes café-quality coffee at home by controlling the key variables: fresh beans, a consistent grind, an accurate dose and ratio, good water and clean equipment. Start with a burr grinder, a scale and fresh beans, then add an espresso machine and milk-steaming skills as you improve.
Key Takeaways
- Grinder first: a good burr grinder improves your coffee more than an expensive machine does.
- Weigh everything: a reliable starting espresso recipe is 18 g of coffee in and 36 g of espresso out, in roughly 25 to 30 seconds.
- Buy fresh: use beans roasted within the last 4 to 6 weeks, and let them rest about a week after roasting for espresso.
- Change one thing at a time: adjust the grind first, then dose or ratio, and taste after every shot.
- Water counts: use filtered water with some minerals, not distilled and not very hard.
- Clean often: rinse and backflush (where your machine allows) so old oils don’t make shots bitter.
- Best for beginners: a simple setup of grinder, scale and a reliable machine, built up over time.
Quick Comparison: Home Barista Setups by Level
You can start brewing like a barista at almost any budget; the right setup depends on how much control and milk-drink capability you want.
| Setup level | Best for | Brewing gear | Grinder | Approx. total cost (USD) |
|---|---|---|---|---|
| Manual starter | Curious beginners on a tight budget | AeroPress, moka pot or pour-over | Hand burr grinder | $100 to $300 |
| Espresso starter | Capsule or instant drinkers ready to upgrade | Entry semi-automatic espresso machine with steam wand | Entry electric burr grinder | $400 to $800 |
| Home café | Daily flat whites, lattes and cappuccinos | Single boiler, thermoblock or heat-exchanger machine | Espresso-capable burr grinder | $800 to $1,800 |
| Enthusiast | Dialling in single origins with precision | Dual boiler or PID-controlled machine | Flat burr, stepless grinder | $2,000 to $4,000+ |
Prices are approximate and vary by region, retailer and sales. Treat them as a planning guide, not a quote.
What Is a Home Barista?
A home barista is someone who prepares espresso-based and specialty coffee drinks at home using café-level technique. That means choosing fresh coffee beans, grinding to order, measuring dose and yield, extracting espresso, steaming milk and keeping equipment clean. You don’t need professional gear, just consistency and a willingness to taste and adjust.
The five skills every home barista builds
- Weighing and dosing: measuring coffee and espresso by weight, not by scoop or guesswork.
- Grinding and dialling in: matching grind size to your beans so extraction lands in the sweet spot.
- Extraction: distributing and tamping the coffee evenly, then controlling time and ratio.
- Milk texturing: steaming milk to a glossy, velvety microfoam for lattes and flat whites.
- Cleaning and maintenance: keeping oils, scale and milk residue out of the machine.
Pros and cons of becoming a home barista
Pros
- ✔ Better coffee than most takeaway cups once you’re dialled in
- ✔ Full control over beans, strength, milk and sweetness
- ✔ Lower cost per cup than daily café visits over time
Cons
- ✘ Upfront cost for a machine and a good grinder
- ✘ A learning curve of a few weeks before shots taste consistent
- ✘ A daily rinse-and-wipe routine to keep everything clean
Who it’s best for
Home baristas tend to be daily milk-coffee drinkers, Nespresso and capsule owners wanting more control, and anyone who enjoys a hands-on morning ritual. If you only want a quick cup with no fuss, a good automatic machine or filter brewer may suit you better.
☕ Frothy Fusion Tip: Keep a small notebook or phone note for your first month. Record the bean, dose, grind setting, yield, time and taste. Patterns show up quickly, and you’ll stop repeating the same mistakes.
Essential Home Barista Equipment
The essential home barista equipment list is short: a burr grinder, an espresso machine or other brewer, a scale, a tamper and a milk jug. Everything else is a nice extra.
Burr grinder
A burr grinder crushes beans between two rings, producing far more even particles than a blade grinder, which chops unevenly. Even particles extract evenly, so the cup tastes sweeter and cleaner. For espresso you need fine adjustments, so look for many grind steps or a stepless dial. Many baristas suggest spending as much on the grinder as on the machine.
Best for: everyone. If you only upgrade one thing, upgrade this.
Espresso machine or brewer
Your machine sets how much control you have and how quickly you can make milk drinks. Here is how the main types compare.
| Machine type | Control level | Learning curve | Best for |
|---|---|---|---|
| Capsule machine | Low | Very easy | Convenience and consistency |
| Super-automatic (bean-to-cup) | Low to medium | Easy | Hands-off milk coffees |
| Semi-automatic | High | Moderate | Learning real barista skills |
| Manual lever | Very high | Steep | Hands-on enthusiasts |
| Moka pot or AeroPress | Medium | Easy | Espresso-style coffee on a budget |
If you want to learn the craft, a semi-automatic machine with a steam wand is the usual choice. Compare the tradeoffs between espresso and moka pot coffee if you’re deciding between the two.
Digital scale
A scale with 0.1 g accuracy and a built-in timer lets you weigh the dose going in and the espresso coming out. It’s the cheapest tool that makes the biggest difference to consistency.
Tamper and distribution tools
A tamper that fits your basket snugly helps you level the coffee bed. Press evenly and firmly; perfect pressure is less important than a flat, repeatable tamp. A simple distribution tool (often called a WDT tool, which is just fine needles) breaks up clumps before tamping and can reduce channelling.
Milk jug
A stainless-steel pitcher around 350 ml suits one drink, and a 600 ml pitcher suits two. A thin spout helps with pouring and latte art. A thermometer is optional once you learn to feel when the jug is too hot to hold comfortably.
Useful extras
- Knock box for used pucks
- Cleaning brush and a blind basket for backflushing, if your machine supports it
- Filtered water jug
- Microfibre cloths for the steam wand and group head
- Airtight, opaque bean container
☕ Frothy Fusion Tip: Preheat your cup and portafilter with hot water before pulling a shot. A cold cup can drop the temperature of a small espresso quickly and dull the flavour.
Coffee Beans and Water: The Foundation of Every Cup
Fresh, well-chosen coffee beans and clean, balanced water do more for flavour than any piece of equipment. Get these right before you worry about upgrades.
How to choose coffee beans
Buy whole beans with a roast date printed on the bag, not just a best-before date. The roast date tells you how fresh the coffee really is.
- Resting: freshly roasted beans release carbon dioxide, which can make espresso sour and foamy. Let them rest about 7 to 14 days after roasting for espresso.
- Peak window: most coffee tastes best within roughly 4 to 6 weeks of the roast date.
- Storage: keep beans in an airtight, opaque container somewhere cool and dry. Avoid keeping them on the machine, where heat speeds up staling.
- Quantity: buy small bags more often rather than a large bag that goes stale.
Roast levels at a glance
| Roast level | Typical flavour | Best for |
|---|---|---|
| Light | Bright, fruity, floral | Filter, pour-over and adventurous espresso |
| Medium | Balanced, caramel, chocolate | All-rounder for espresso and milk drinks |
| Dark | Bold, roasty, low acidity | Strong milk coffees and moka pot |
Beginners usually find medium roasts the most forgiving to dial in, especially for milk-based drinks.
Why water matters
A cup of coffee is mostly water, so water quality shapes the taste. Very hard water leaves scale in your machine, while distilled or heavily softened water can taste flat and under-extract.
The Specialty Coffee Association’s brewing water guidance points to a moderate mineral content, with total dissolved solids around 150 ppm, a neutral pH and no chlorine taste. Check the Specialty Coffee Association for the full standard, and check your machine’s manual for any water recommendations that protect the warranty.
A simple jug filter, or bottled water with a moderate mineral content, is a practical upgrade for most homes.
☕ Frothy Fusion Tip: If your coffee tastes dull or chalky even with fresh beans, test your water first. Switching to filtered water is often the quickest fix, and costs almost nothing.
👉 Start brewing better today: Read How to Make Espresso at Home
Grinding and Dialling In Espresso
What does dialling in mean?
Dialling in means adjusting your grind size, dose and yield until your espresso tastes balanced. Each new bag of beans behaves a little differently, so you’ll usually tweak the grind setting when you open a fresh bag. Small, one-at-a-time changes with a scale and a timer get you there fastest.
Start with a reliable espresso ratio
The brew ratio compares the dry coffee you put in with the liquid espresso you take out. A 1:2 ratio is the standard starting point.
| Style | Ratio (in:out) | From an 18 g dose | Typical taste |
|---|---|---|---|
| Ristretto | 1:1 to 1:1.5 | 18 to 27 g | Intense, syrupy, sweeter |
| Standard espresso | 1:2 | 36 g | Balanced, the default |
| Lungo | 1:3 | 54 g | Lighter, more bitter edge |
For more detail, read our guide to espresso ratios, which explains how each one changes flavour.
How to dial in, step by step
- Set your recipe: dose 18 g into the portafilter basket (check your basket’s recommended dose) and aim for 36 g of espresso.
- Pull the shot and time it: a good target is about 25 to 30 seconds from the moment the pump starts.
- Taste it: sour, sharp and thin means under-extracted. Bitter, dry and harsh means over-extracted.
- Adjust the grind first: shots that run fast and taste sour need a finer grind. Shots that run slow and taste bitter need a coarser grind.
- Keep dose and ratio steady while you change only the grind, in small steps.
- Fine-tune the yield: once the timing is right, stop the shot slightly earlier for more intensity or later for more length.
Quick reference: what your shot is telling you
| What you taste | What it means | What to change |
|---|---|---|
| Sour, sharp, watery | Under-extracted, ran too fast | Grind finer |
| Bitter, dry, harsh | Over-extracted, ran too slow | Grind coarser |
| Flat and dull | Stale beans or old, dirty gear | Fresh beans and a clean machine |
| Balanced and sweet | Well extracted | Note your settings and repeat |
☕ Frothy Fusion Tip: Change the grind in very small increments and always write it down. A single click on a grinder can shift a shot by several seconds.
How to Pull an Espresso Shot at Home, Step by Step
To pull an espresso shot at home, heat the machine, weigh and grind your coffee, distribute and tamp it evenly, lock in the portafilter and start the shot straight away. Aim for about 36 g of espresso from 18 g of coffee in roughly 25 to 30 seconds, then taste and adjust.
Step 1: Warm up the machine and cup
Turn the machine on early. Many semi-automatic machines need around 15 to 30 minutes for the group head and portafilter to heat fully, but check your manual. Run hot water through the portafilter and your cup.
Image idea: espresso machine with portafilter and cup warming on top.
Step 2: Weigh and grind
Place the portafilter on the scale, tare it, and grind your dose directly into it. Weigh to the tenth of a gram so every shot starts the same.
Image idea: portafilter on a scale showing the dose.
Step 3: Distribute and tamp
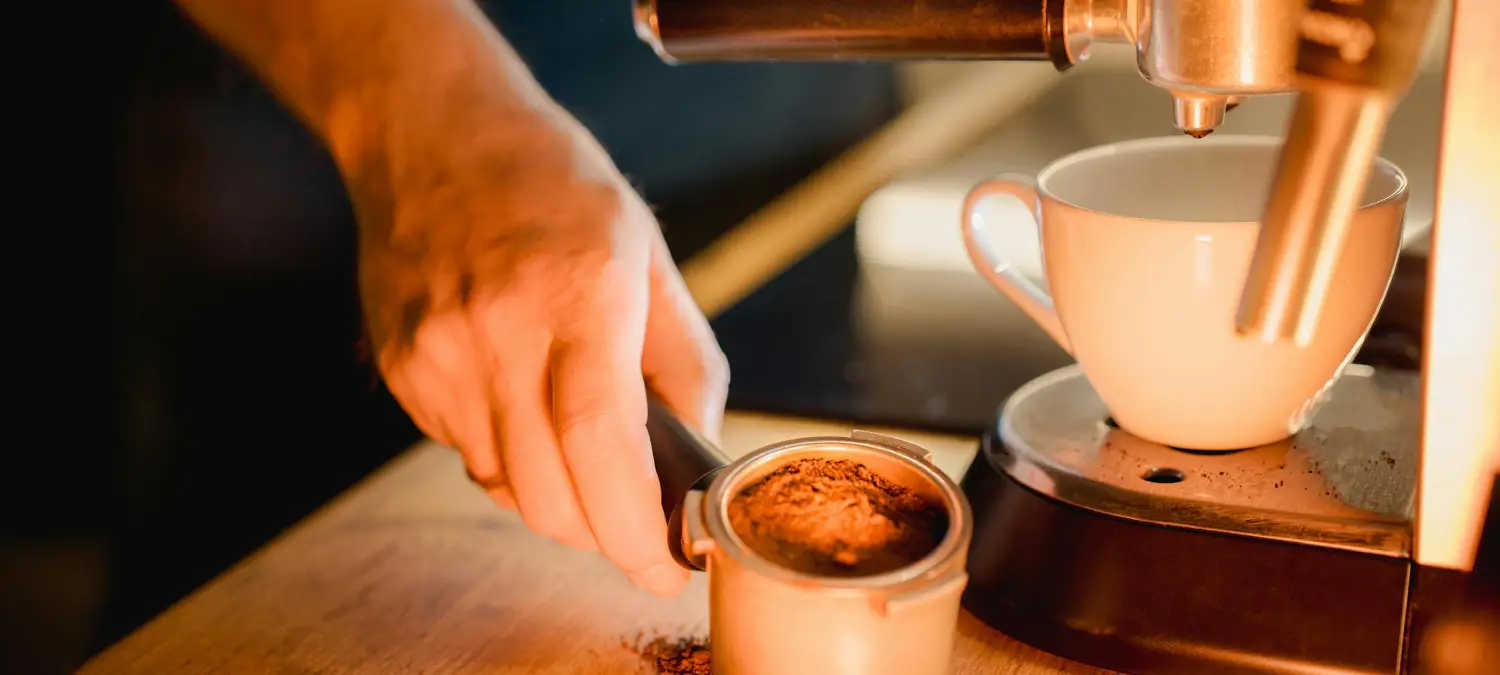
Level the grounds with a distribution tool or a gentle tap on the side, then press the tamper down so the surface is flat and even. Tamp once, without twisting.
Image idea: close-up of a level tamp.
☕ Frothy Fusion Tip: Even, level coffee matters more than tamping extremely hard. Uneven beds cause channelling, where water finds a shortcut and part of the coffee is under-extracted.
👉 Coffee Brewing Fundamentals: How to Make Better Coffee
Step 4: Flush, lock in and start
Briefly flush the group head to clear loose grounds and stabilise temperature, wipe the basket edge, lock in the portafilter and start the shot immediately. Start your scale and timer at the same time.
Step 5: Watch the flow
You should see the first drops after about 5 to 10 seconds, then a steady, honey-coloured stream. A very fast gush or a stream that sputters suggests the grind is too coarse or the puck is uneven.
Image idea: espresso pouring into a glass cup on a scale.
Step 6: Stop, taste and note
Stop the shot when the scale reaches your target yield. Give it a gentle swirl, taste it, and make a note of the grind setting, dose, yield, time and flavour.
Step 7: Clean up straight away
Knock out the puck, rinse the portafilter and basket, and wipe the steam wand and group head. Doing this each time takes about a minute and prevents buildup.
Milk Steaming and Milk Coffee Basics
How do you steam milk at home?
To steam milk, start with cold milk in a cold jug, purge the steam wand, and hold the tip just below the surface for a few seconds to add air. Then submerge it to spin the milk into a smooth whirlpool until the jug is warm to hold, about 55 to 65°C (130 to 150°F).
Milk steaming step by step
- Fill the jug: pour cold milk to just below the base of the spout. Fresh, cold milk gives you more time to work.
- Purge the wand: a quick burst clears condensed water.
- Stretch the milk: place the tip just under the surface and open the valve. You should hear a gentle paper-tearing hiss for 2 to 5 seconds, adding air.
- Texture the milk: lower the tip deeper, off-centre, so the milk spins in a whirlpool and the bubbles break down into silky microfoam.
- Stop at the right temperature: close the valve when the jug is hot but still comfortable to hold. Above about 65°C (150°F), milk starts to taste flat and lose sweetness.
- Tap, swirl and pour: tap the jug on the bench to pop large bubbles, swirl it until glossy, then pour.
- Wipe and purge: clean the wand with a damp cloth immediately, then purge it again.
❌ Common mistake: Leaving the wand tip too deep in the milk for the whole time. You’ll get hot milk with no texture. Stretch first, then spin.
Milk coffee drinks compared
Use the same espresso base and change the milk to make each of these. Sizes vary by café and country, so the volumes below are approximate.
| Drink | Milk texture | Foam level | Approx. size |
|---|---|---|---|
| Flat white | Thin, velvety microfoam | Low | 150 to 220 ml |
| Latte | Silky with a thin foam layer | Low to medium | 220 to 350 ml |
| Cappuccino | Thick, airy foam | High | 150 to 180 ml |
| Cortado | Warm milk, minimal foam | Very low | 100 to 120 ml |
If you can’t decide between two of them, our latte vs flat white guide explains the difference in detail.
Other ways to brew at home
Not every home barista starts with an espresso machine. These methods also teach you the same fundamentals of ratio, grind and timing.
| Method | Flavour | Ease | Best for |
|---|---|---|---|
| Moka pot | Strong, rich, espresso-style | Easy | Stovetop coffee with no machine |
| AeroPress | Clean, adjustable | Easy | Travel and experimenting |
| Pour-over | Bright, clear, nuanced | Moderate | Single-origin filter coffee |
| French press | Full-bodied, heavier | Very easy | Simple, relaxed brewing |
☕ Frothy Fusion Tip: Practise steaming with water and a drop of dish soap before using milk. It won’t taste like coffee, but you’ll learn the wand’s movements without wasting milk.
Common Home Barista Mistakes and How to Fix Them
Most disappointing espresso comes from a short list of avoidable habits. Fix these and your coffee improves quickly.
Avoid
❌ Using stale or pre-ground beans
❌ Guessing doses instead of weighing
❌ Changing several variables at once
❌ Skipping cleaning and descaling
❌ Overheating milk
❌ Using water that is too hard or too soft
Mistakes explained
- Relying on volume, not weight: scoops vary by bean and roast. A scale takes the guesswork out.
- Chasing a perfect shot too fast: it normally takes several shots to dial in a new bag. Waste is part of the process.
- Ignoring the grinder: a poor grinder limits every other upgrade you make.
- Not preheating: a cold portafilter and cup steal heat and can make shots taste sharp.
- Forgetting maintenance: old coffee oils turn bitter, and mineral scale can damage a machine over time.
Troubleshooting guide
| Problem | Likely cause | Try this |
|---|---|---|
| Shot runs very fast, tastes sour | Grind too coarse or dose too low | Grind finer; check the dose |
| Shot barely drips, tastes bitter | Grind too fine or dose too high | Grind coarser; check the dose |
| Spurting or uneven stream | Channelling from uneven distribution | Distribute grounds and tamp level |
| Thin or no crema | Stale beans or coarse grind | Use fresher beans and grind finer |
| Milk has big bubbles | Too much air or wand too shallow | Shorten stretching; swirl and tap |
| Milk tastes flat or burnt | Overheated | Stop steaming at about 60°C (140°F) |
☕ Frothy Fusion Tip: Crema isn’t a guarantee of quality, and some great espresso has a thin layer. Judge your shot by taste, not just looks.
Cleaning and Maintaining Your Home Barista Setup
A clean setup tastes better and lasts longer. Old coffee oils turn rancid and bitter, and mineral scale shortens a machine’s life. Always follow your manufacturer’s instructions, since procedures differ between models.
| Task | How often | Why it matters |
|---|---|---|
| Rinse portafilter and basket | After every shot | Removes fresh grounds and oils |
| Wipe and purge steam wand | After every use | Stops milk residue baking on |
| Wipe group head and shower screen | Daily | Keeps flow even |
| Empty and rinse drip tray and knock box | Daily | Prevents smells and mould |
| Backflush with a blind basket (where supported) | Weekly, or as the manual says | Clears oils from the group head |
| Clean grinder burrs and hopper | Every 1 to 2 months | Prevents stale grounds and odd flavours |
| Descale | As the manual advises, depending on water hardness | Protects heating elements and keeps temperature stable |
☕ Frothy Fusion Tip: Not every machine can be backflushed. Machines with certain valve designs or those that are capsule or bean-to-cup have their own cleaning cycles, so check the manual before using cleaning tablets or a blind basket.
For a full walkthrough on caring for specific machines, see the cleaning and descaling guides on the site, and use only descalers recommended by the manufacturer.
Home Barista Buying Guide: What to Look For
When choosing gear, match the equipment to how you drink coffee, not to a spec sheet. Here are the factors that matter most.
Budget
Spread your budget sensibly: a good grinder, a reliable machine, a scale and fresh beans. Many people overspend on the machine and under-spend on the grinder, which limits quality.
Size and counter space
Measure your bench and the clearance under your cupboards, including room to fill the water tank and remove the portafilter. Compact machines suit small kitchens but often have smaller tanks.
Features that matter
- Steam power and a good wand: essential if you love flat whites and lattes.
- Temperature stability: machines with PID temperature control or a dual boiler give more consistent shots.
- Pressure and pump: look for machines with stable pressure around 9 bar at the group head.
- Water tank capacity: larger tanks mean fewer refills.
- Programmable shot volume: helpful for beginners, though less important if you use a scale.
Ease of cleaning
Removable drip trays, accessible water tanks, and a steam wand you can wipe easily make daily upkeep far less of a chore.
Warranty and servicing
Check the warranty length, what it covers, and whether local service and spare parts are available. A machine that can be repaired is a better long-term purchase.
Brand reputation
Choose established brands with a track record of customer support and easily available replacement parts. Read multiple owner reviews and look for recurring problems, not just star ratings.
Pros and cons of buying a semi-automatic machine
Pros
- ✔ Full control over dose, grind, ratio and timing
- ✔ Better milk drinks with a proper steam wand
- ✔ Skills you’ll keep using as you upgrade
Cons
- ✘ A learning curve and some wasted shots at first
- ✘ Needs a separate quality grinder
- ✘ More cleaning than a capsule machine
This guide is an educational overview based on established brewing practice and published specialty coffee guidance, not a hands-on test of specific products. When you shop, check current specifications and reviews for any model you’re considering.
Frequently Asked Questions About Being a Home Barista
How do I become a home barista?
Start with fresh whole beans, a burr grinder and a scale. Learn one brewing method well, whether that’s espresso, moka pot or pour-over, and change one variable at a time while tasting. Add milk steaming once your shots are consistent. Keep notes on every brew, clean your gear regularly, and expect a few weeks of practice before things click.
What equipment do I need to be a home barista?
At minimum you need a burr grinder, a coffee brewer such as an espresso machine, moka pot or AeroPress, and a digital scale. For milk drinks, add a steam wand and a milk jug. A tamper, knock box, filtered water and cleaning supplies round out a good starter setup without overspending.
How much does a home barista setup cost?
A manual starter setup can cost roughly $100 to $300, while a beginner espresso machine and grinder commonly cost around $400 to $800 or more. Mid-range home café setups often fall between $800 and $1,800, and enthusiast gear can exceed $2,000. Prices vary by region and retailer, so compare current offers before buying.
Is the grinder or the espresso machine more important?
For most people, the grinder matters at least as much as the machine. Espresso needs fine, consistent particles and precise adjustments, and an inconsistent grind causes uneven extraction no matter how good the machine is. If your budget is limited, pair a quality grinder with a modest machine rather than the other way around.
How long does it take to learn to make good espresso at home?
Most beginners can pull drinkable shots within a few days and consistent, tasty ones within a few weeks of regular practice. Milk texturing and latte art often take longer. Weigh your dose and yield, keep notes, and change one variable at a time to speed up your progress.
What is a good espresso ratio for beginners?
A 1:2 ratio is the standard starting point: 18 g of ground coffee produces about 36 g of liquid espresso in around 25 to 30 seconds. From there, adjust the grind first for timing, then tweak the ratio for taste. Shorter ratios taste more intense, while longer ones taste lighter and more bitter.
Can I make espresso without an espresso machine?
Not true espresso, which relies on roughly 9 bar of pressure. However, a moka pot or AeroPress can make strong, concentrated, espresso-style coffee that works well in milk drinks. If you love the espresso experience, a small semi-automatic machine is a better long-term investment than workarounds.
Does Nespresso make real espresso?
Nespresso machines use pressurised water to brew concentrated coffee, and many models are designed to produce espresso-style shots. They offer convenience and consistency but less control over grind, dose and extraction. Many Nespresso owners upgrade to a semi-automatic machine once they want to experiment with fresh beans and technique.
How often should I clean my espresso machine?
Rinse the portafilter and wipe the steam wand after every use, and wipe the group head daily. Backflush weekly if your machine supports it, and descale as the manufacturer recommends, depending on how hard your water is. Regular cleaning keeps shots tasting fresh and protects the machine.
Final Verdict: Your Home Barista Journey Starts Small
Becoming a home barista is less about expensive equipment and more about consistent habits: fresh beans, a good burr grinder, weighing your dose and yield, adjusting one variable at a time, and keeping everything clean. Master these basics and your coffee will rival many cafés, whichever brewer you choose.
- Who it’s for: home coffee drinkers who enjoy a hands-on ritual, daily milk-coffee fans, and capsule users who want more control.
- Who should avoid it: anyone who wants a fast, zero-effort cup every morning. A good bean-to-cup or capsule machine will suit you better.
- Best alternatives: a moka pot, AeroPress or pour-over if you want better coffee without the cost of an espresso machine.
☕ Essential Home Barista Setup
Espresso Machine (Starter Pick)
Grinder
👉 Baratza Encore
Tools
👉 Tamper + Scale + Knock Box
☕ Espresso Basics
👉 Start here:
- How to Make a Triple Shot Espresso
- Espresso vs French Press vs Pour Over
- How Much Caffeine Is in Espresso
🎯 Improve Your Espresso Instantly
- Better tamping → consistent shots
🧪 Brewing Methods
Explore different brewing styles:
- Espresso
- French press
- Pour over
- Turkish coffee
🥛 Milk & Coffee Drinks
Learn how to make:
👉 Why not try these Mocha Variations at home?
🛠️ Barista Skills
Improve your technique:
👉 Learn How To Use An Espresso Knock Box
What to Read Next
- Learn how brew ratios change flavour with our guide to espresso ratios.
- Improve your technique with our guide to tamping espresso.
- Compare milk drinks in our latte vs flat white breakdown.
- Browse more brewing techniques and coffee recipes on Frothy Fusion
- Ready to level up you – How to Make a Triple Shot Espresso
☕ Just a heads up—this post contains affiliate links. If you buy through them, Frothy Fusion may earn a small commission (at no cost to you). Thanks for supporting our coffee-fueled content!