Latte art is a captivating way to enhance your coffee experience. Not only does it add a touch of artistry to your morning routine, but it also showcases your skills as a home barista. If you’ve ever been mesmerized by intricate designs on your cappuccino or latte, this guide will help you learn how to create them yourself. Whether you’re just starting or want to elevate your coffee game, here’s everything you need to know about latte art for beginners.
What Is Latte Art?
Latte art is the process of creating designs on the surface of a latte, cappuccino, or any milk-based coffee drink by pouring steamed milk into espresso. The contrast between the creamy milk foam and the dark espresso creates striking patterns.
Why Learn Latte Art?
- Enhances Presentation: Beautifully crafted coffee is not only enjoyable but also Instagram-worthy.
- Improves Coffee Skills: Mastering latte art means improving your milk steaming and pouring techniques.
- Adds a Personal Touch: Making coffee for guests with custom designs makes the experience special.
Tools and Ingredients You’ll Need
Before diving into the techniques, make sure you have the right tools and ingredients.
Essential Tools
- Espresso Machine: A reliable espresso machine with a steam wand is non-negotiable.
- Milk Frothing Pitcher: Use a stainless steel pitcher with a pointed spout for precise pouring.
- Thermometer: To ensure milk is steamed to the correct temperature.
- Latte Art Pen or Toothpick (Optional): Useful for etching intricate designs.
Ingredients
- Freshly Brewed Espresso: The crema layer is essential for contrast.
- Milk: Whole milk is preferred for its richness and ability to create microfoam, but alternatives like oat or almond milk also work with practice.
The Foundations of Latte Art

Step 1: Pulling the Perfect Espresso Shot
A strong foundation begins with a good espresso shot. Follow these steps:
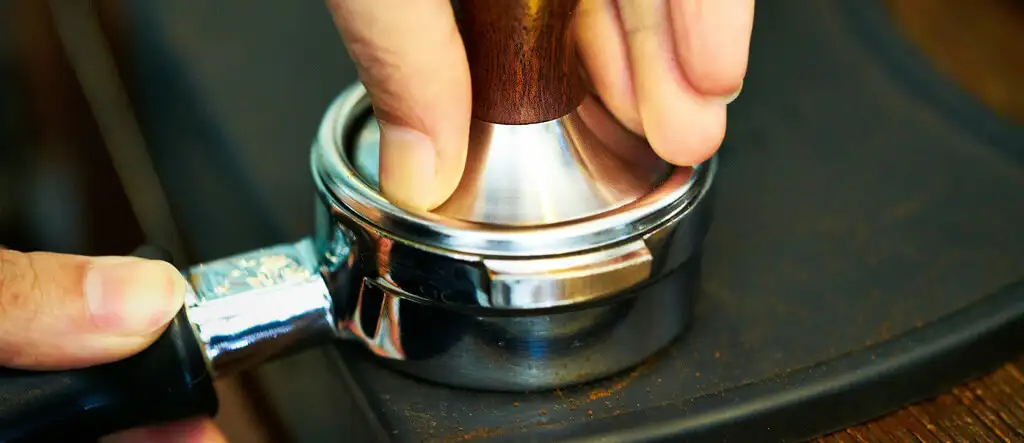
- Grind Fresh Beans: Use a burr grinder to achieve a fine, consistent grind.
- Tamp Evenly: Use a tamper to apply even pressure to the coffee grounds.
- Extract the Shot: Aim for a shot that pours in 25-30 seconds. The crema should be rich and golden brown.
Step 2: Steaming Milk to Perfection
Creating microfoam is the key to great latte art. Here’s how:
- Fill the Pitcher: Pour cold milk up to the bottom of the spout.
- Position the Wand: Submerge the steam wand just below the milk’s surface.
- Stretch the Milk: Start with the wand slightly tilted to introduce air and create microfoam.
- Heat the Milk: Once you’ve achieved microfoam, position the wand deeper and heat the milk to around 140-160°F (60-70°C).
- Swirl the Milk: Tap the pitcher lightly on the counter and swirl to remove bubbles.
Step 3: The Pouring Technique
Pouring milk correctly into espresso is where the magic happens. Remember these tips:
- Hold the Cup at an Angle: Start with a slight tilt.
- Pour High: Begin pouring from a height of about 4 inches to mix milk and espresso.
- Lower the Pitcher: As you get closer to the surface, reduce the height and pour slower to create patterns.

Beginner Latte Art Designs
1. The Heart
The heart is a classic and simple design for beginners.
- Start in the Center: Begin pouring in the middle of the cup.
- Pull Back: As the white foam appears, pull the pitcher back slightly.
- Finish with a Stroke: Create the heart shape by flicking the pour forward.

2. The Rosetta
This leaf-like design is slightly more challenging but rewarding.
- Pour Close to the Surface: Move the pitcher closer to the espresso.
- Wiggle the Pitcher: Use a gentle back-and-forth motion as you pour.
- Pull Through: Finish by drawing a line through the center.

3. The Tulip
The tulip involves layering multiple hearts.
- Pour a Small Heart: Start by creating a single heart.
- Layer Additional Hearts: Pull back slightly and repeat.
- Finish with a Stroke: Complete the design by pulling through the hearts.

Common Latte Art Challenges and How to Overcome Them
1: Bubbles in the Milk
- Solution: Ensure you’re steaming milk properly. Tap and swirl the pitcher to eliminate bubbles.
2: Thin Crema
- Solution: Use freshly roasted coffee beans and ensure your espresso shot is extracted correctly.
3: Patterns Not Holding
- Solution: Make sure the milk has the right consistency (silky and glossy microfoam).

Your Latte Art for Beginners Tips
Practice Makes Perfect
- Repetition is Key: The more you practice, the better your control will be.
- Watch Tutorials: Learning from experienced baristas can accelerate your progress.
Experiment with Milk Types
- Whole milk is the easiest to work with, but plant-based alternatives like oat milk can also create decent foam.
Use Proper Techniques
- Hold your tools correctly and maintain a steady hand for precision.
Clean Your Equipment
- Residue can affect the quality of your milk and espresso. Clean your steam wand and pitcher after every use.
Advanced Techniques for Aspiring Baristas
Once you’ve mastered the basics, try these advanced designs:
The Swan
This elegant design involves creating a rosetta and adding intricate details with a latte art pen.
The Phoenix
A complex pattern that combines free pouring and etching to create a mythical bird.
3D Latte Art
Use thick foam to sculpt designs like bears or flowers.
Troubleshooting Latte Art Problems
Milk Too Hot
- Overheated milk loses its sweetness and becomes harder to pour. Stick to 140-160°F.
Espresso Too Bitter
- Bitter espresso can ruin the balance of your drink. Adjust your grind size and extraction time.
Difficulty with Consistency
- Use the same amount of milk and espresso each time to build consistency.
Wrapping Up
Latte art is an enjoyable and rewarding skill that can elevate your coffee experience. By mastering the basics and practicing regularly, you’ll be creating stunning designs in no time. Remember, patience is key, and each cup is an opportunity to improve. So grab your tools, steam that milk, and let your creativity flow!