
A Beginner’s Step-by-Step Guide
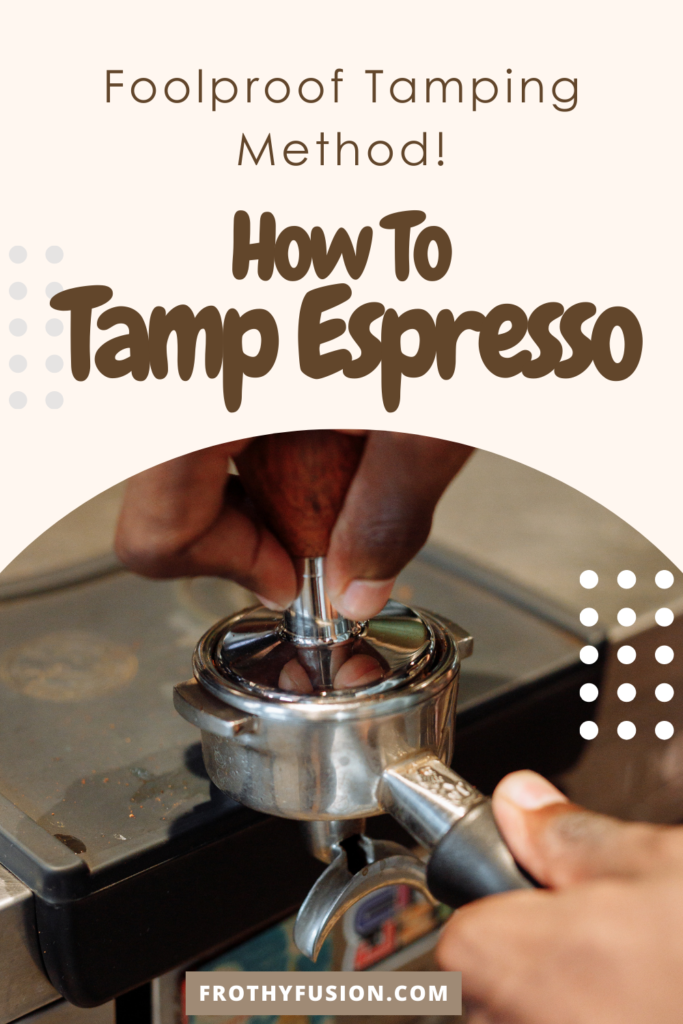
Learning to tamp espresso is one of the quickest ways to improve your home espresso. Tamping means pressing the ground coffee in the portafilter into a flat, even puck so water flows through it evenly.
- A Beginner's Step-by-Step Guide
- Quick Answer: How Do You Tamp Espresso?
- Key Takeaways
- Quick Reference Table
- What Is Tamping in Espresso?
- Why Tamping Matters for Espresso Extraction
- What Tamping Does and Doesn't Do
- What You Need to Tamp Espresso
- Choosing the Right Tamper Size
- How to Tamp Espresso: Step-by-Step Guide
- How Hard Should You Tamp Espresso?
- Common Tamping Mistakes to Avoid
- Does Twisting or "Polishing" the Tamper Matter?
- Troubleshooting: What Your Shot Is Telling You
- Tamping Tips for Beginners and Home Baristas
- Tamping for Different Machines and Setups
- Frequently Asked Questions
- What does it mean to tamp espresso?
- How hard should you tamp espresso?
- Can you tamp espresso too hard?
- Do you need to tamp espresso with a machine that has a pressurised basket?
- What happens if you don't tamp espresso?
- Is a level tamp more important than pressure?
- Does tamper size matter?
- Do you tamp espresso before or after distributing the grounds?
- Final Verdict
- Next Steps
- ⚙️ Helpful Gear for Better Tamping
Get it right and extraction is balanced, shots are more consistent, and you see fewer sour or bitter surprises. This guide covers how to tamp espresso, how hard to press, which mistakes to avoid, and how to troubleshoot your shots.
Quick Answer: How Do You Tamp Espresso?
To tamp espresso, distribute the grounds evenly in the portafilter basket and press straight down with a tamper until the surface is level and firm. Keep your wrist straight and the tamper level, and apply the same steady pressure every time. Consistency and levelness matter more than raw force.
Key Takeaways
- Tamping creates an even, level puck so water extracts the coffee uniformly.
- A level tamp matters more than a hard one. Consistency beats force.
- A common beginner target is firm, moderate pressure, roughly 30 lb (about 14 kg). It isn’t a strict rule.
- Distribute the grounds before tamping to reduce channeling.
- Your grind size and dose affect extraction more than tamp pressure does.
- Use a tamper that fits your basket snugly (58 mm is the common size on commercial-style machines).
Quick Reference Table
| Factor | What to Aim For | Why It Matters |
|---|---|---|
| Pressure | Firm, moderate, repeatable | Consistent resistance for even flow |
| Angle | Perfectly level | Prevents one side extracting faster |
| Grounds | Evenly distributed, no clumps | Reduces channeling |
| Tamper fit | Snug, with a hairline gap at the edge | Seals the puck edge without catching on the basket |
| Technique | Straight wrist, elbow above the tamper | Repeatable and comfortable |
What Is Tamping in Espresso?
Tamping is the act of compressing ground coffee in the portafilter basket before brewing. An espresso machine pushes hot water through the coffee at high pressure, and the puck needs to resist that water evenly.
Loose, uneven grounds let water rush through the path of least resistance, which leads to uneven extraction.
Tamping doesn’t fix a poor grind or dose, but it’s the final step in preparing the puck, and it’s the one that lets everything before it work properly.
Why Tamping Matters for Espresso Extraction
Espresso extraction is how water dissolves flavour compounds from the coffee. For good extraction, water should flow through the puck at a similar rate everywhere. A level, even tamp helps with that.
When extraction is uneven, you usually get two things at once:
- Under-extracted areas taste sour, thin, or salty.
- Over-extracted areas taste bitter, harsh, or hollow.
Together they make a muddled, unpleasant shot. This is called channeling, and it’s the main reason tamping technique is worth learning.
What Tamping Does and Doesn’t Do
Tamping does:
- Compact the grounds into a uniform puck
- Create resistance so the machine can build pressure
- Help produce a more consistent shot and better crema
Tamping doesn’t:
- Replace the right grind size
- Fix an inaccurate dose
- Compensate for stale beans
What You Need to Tamp Espresso
You don’t need much for good tamping at home.
- A tamper that fits your portafilter basket
- A portafilter with the basket in place
- A grinder that produces a consistent espresso grind
- A scale for dosing (optional, but very helpful for consistency)
- A stable surface at a comfortable height
Choosing the Right Tamper Size
Baskets come in different diameters, and your tamper should match yours. Common sizes include 49 mm, 51 mm, 53 mm, 54 mm, and 58 mm. Check your machine’s manual or measure the inside of the basket.
A good fit leaves only a tiny gap around the edge. If the tamper is too small, grounds can slip around the edges and weaken the seal. If it’s too large, it won’t enter the basket at all.
If your machine came with a plastic tamper, it works for learning the motion, but any tamper that fits snugly with a flat base can do the same job.
☕ Frothy Fusion Tip: Lay the tamper in the empty basket before you start. It should drop in smoothly with an even gap all around, never wedge or tilt.
How to Tamp Espresso: Step-by-Step Guide
Step 1: Grind and Dose Your Coffee
Grind fresh beans to an espresso-fine setting and measure your dose. For a standard double shot in a 58 mm basket, many people start around 18 g, but your basket’s rated capacity is the best guide.
Dosing by weight is more reliable than by volume because ground coffee’s density changes with grind size and roast.
Step 2: Distribute the Grounds Evenly
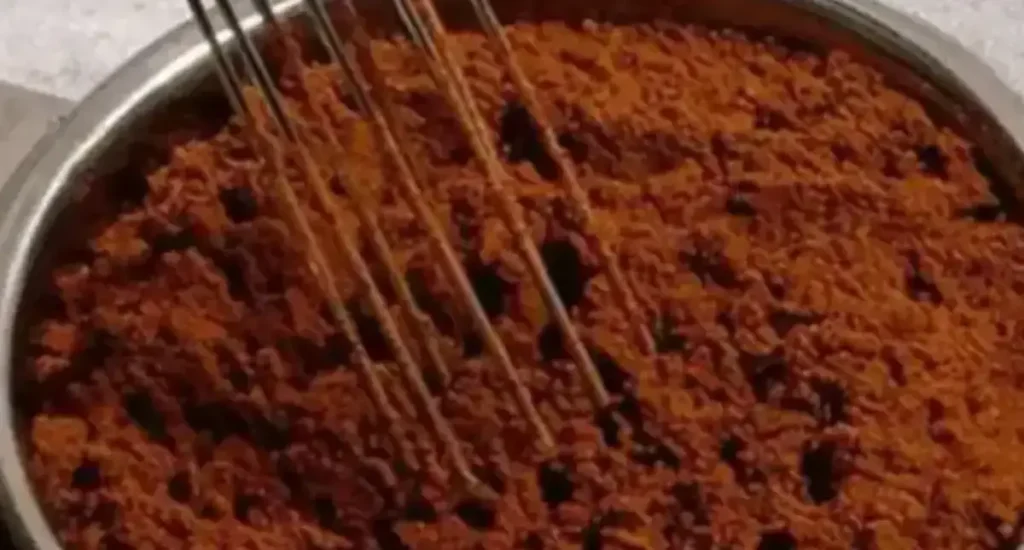
Before tamping, level the grounds in the basket. Tap the side of the portafilter gently to settle them, or sweep a finger across the top to spread the coffee into an even bed. Break up clumps as you go.
Some people also use a distribution tool or a thin needle (often called WDT, or Weiss Distribution Technique) to loosen clumps. These are optional, but they’re a cheap and effective way to reduce channeling.
Add your own note here: Mention which distribution method you use and the difference you noticed. First-hand detail like this strengthens EEAT.
Step 3: Position the Portafilter
Rest the portafilter on a stable, flat surface such as a counter or a tamping mat. Keep the basket level. If the portafilter tilts, your tamp will too.
Step 4: Set Your Grip and Posture
Hold the tamper like a doorknob, with the handle resting in your palm and your fingers wrapped around the base. Stand so your forearm sits roughly in line with the tamper and your elbow is above it.
Keep your wrist straight and avoid bending it sideways. A straight wrist lets you push with your body weight instead of your hand and reduces the chance of tilting.
Step 5: Press Straight Down
Lower the tamper onto the grounds and press down in one smooth motion. Aim for firm, consistent pressure. Keep the tamper level, and check that it isn’t tilting as you press.
Stop when the coffee stops compressing. Pushing harder after that point doesn’t improve extraction.
Step 6: Lift Cleanly and Check the Puck
Release the pressure and lift the tamper straight up without twisting, so you don’t disturb the surface. The puck should look flat and smooth, with no loose grounds around the rim.
If you see loose grounds on the edge, wipe them away before locking in the portafilter, since loose grounds can end up in the group head or the cup.
Step 7: Lock In and Brew Immediately
Insert the portafilter and start the shot right away. A freshly tamped puck is at its best when water hits it straight away, and a long wait can let it absorb moisture from the machine’s heat.
☕ Frothy Fusion Tip: Wipe the rim of the basket before locking in. A clean rim helps the portafilter seat properly and keeps the group head gasket cleaner.
How Hard Should You Tamp Espresso?
A widely quoted guideline is about 30 lb (roughly 14 kg) of pressure, and many beginners find it a useful starting point. You can practise by pressing a tamper on a bathroom scale to learn what that feels like.
That said, research and experienced baristas generally agree that tamp pressure is less important than consistency and levelness. Once the puck is compressed, extra force doesn’t reduce flow much. What changes shot to shot is usually grind size, dose, and distribution, not whether you pressed at 25 or 40 lb.
Use pressure as a repeatable habit instead of a number to hit:
- Use the same motion every time.
- Stop pressing once the puck is firm.
- Change your grind to adjust flow, not your tamp.
If your shots run too fast or too slow, adjust the grind size first.
Common Tamping Mistakes to Avoid
Avoid
❌ Tamping at an angle
❌ Using uneven or clumpy grounds
❌ Pressing harder to fix a bad grind
❌ Twisting aggressively while lifting
❌ Leaving loose grounds on the basket rim
❌ Using a tamper that doesn’t fit the basket
Tilted Tamping
A tilted tamp leaves one side of the puck denser than the other, and water flows through the looser side. Check the puck from the side to confirm it’s flat.
Over-Tamping or Under-Tamping
Tamping very lightly can leave a loose puck that water disturbs. Pressing extremely hard won’t improve the shot and may strain your wrist. Aim for the middle.
Skipping Distribution
Pressing uneven grounds locks in the unevenness. A quick distribution step before tamping often does more for the shot than tamping harder.
Tamping Too Early or Too Late
Don’t tamp and then leave the puck sitting for minutes. Prepare it, then brew promptly.
Does Twisting or “Polishing” the Tamper Matter?
You may see baristas give the tamper a small twist at the end, often called polishing. The idea is to smooth the puck surface. Evidence that it improves taste is limited, and an aggressive twist can disturb the puck or break the seal at the edge.
If you do it, keep it light and gentle. Otherwise, a clean straight-down press and straight-up release is perfectly good.
Troubleshooting: What Your Shot Is Telling You
Tamping is only one part of puck preparation, so use these as starting points for diagnosis.
| Symptom | Possible Cause | What to Try |
|---|---|---|
| Shot runs very fast, tastes sour | Grind too coarse, uneven puck | Grind finer, improve distribution |
| Shot runs very slowly, tastes bitter | Grind too fine, dose too high | Grind coarser, check dose |
| Spurting or uneven flow from the spouts | Channeling | Distribute better, level the tamp |
| Puck is wet and soupy afterwards | Overfilled basket or water backing up | Check dose and basket size |
| Inconsistent shots | Variable technique | Standardise dose, distribution, and tamp motion |
Add your own note here: Share a shot you fixed by changing your tamping or distribution. A real example makes the article more trustworthy.
Tamping Tips for Beginners and Home Baristas
- Stay consistent. Use the same dose, distribution, and tamp every time, and change one variable at a time.
- Use a scale. Weighing your dose removes guesswork.
- Focus on a level tamp first. Pressure is secondary.
- Keep your tools clean. Coffee oils build up on tampers and baskets.
- Check your equipment. Pressurised baskets, which many entry-level machines use, are more forgiving of tamping variation than standard baskets.
- Be patient. Muscle memory takes a few dozen shots to develop.
Tamping for Different Machines and Setups
Semi-Automatic and Manual Machines
Tamping matters most on machines that use an open, non-pressurised basket, because there’s nothing to compensate for an uneven puck.
Entry-Level Machines With Pressurised Baskets
Pressurised baskets add their own flow restriction, so extraction depends less on a precise tamp. You still benefit from level, consistent technique, but the shot is less sensitive to small errors.
Capsule Machines
Capsule systems such as Nespresso don’t require tamping at all, since the capsule is pre-dosed and sealed. Tamping applies to portafilter-style machines.
Frequently Asked Questions
What does it mean to tamp espresso?
Tamping espresso means pressing ground coffee into a flat, even puck inside the portafilter basket before brewing. The compact puck gives hot water something to flow through evenly, which supports balanced extraction and a more consistent shot. It’s the last step of puck preparation before you lock the portafilter into the machine.
How hard should you tamp espresso?
Press firmly and consistently. Around 30 lb (about 14 kg) is a common beginner benchmark, but level, repeatable technique matters more than the exact number. Once the grounds are compressed, extra force makes little difference. If the shot runs too fast or slow, adjust your grind size instead of pressing harder.
Can you tamp espresso too hard?
You can, although it’s less of a problem than uneven tamping. Pressing extremely hard offers no clear benefit and can tire your wrist. Excess force can also make a shot choke if the grind is already fine. Use steady, firm pressure and fix flow problems through grind size.
Do you need to tamp espresso with a machine that has a pressurised basket?
You should still tamp lightly and evenly, but the result is more forgiving. Pressurised baskets are designed to build resistance regardless of how the puck is prepared. A level surface still helps with consistency, and it lets you move to a standard basket more easily later.
What happens if you don’t tamp espresso?
If you don’t tamp, the grounds stay loose and uneven. Water finds the easiest path through them, so extraction is uneven and the shot may taste sour, bitter, or weak. The resulting flow can also be too fast and produce thin crema.
Is a level tamp more important than pressure?
Generally, yes. A tilted tamp creates density differences in the puck, so water flows unevenly. Consistent pressure matters, but exact force is less important than keeping the tamper level and using the same motion each time.
Does tamper size matter?
Yes. The tamper should fit your basket snugly, with a very small gap at the edge. A tamper that’s too small leaves uncompressed grounds around the rim, which can let water bypass the puck.
Do you tamp espresso before or after distributing the grounds?
After. Distribute the grounds first so they sit evenly in the basket, then tamp to compress them. Tamping first locks in clumps and uneven areas.
Final Verdict
Who this guide is for: Home coffee drinkers, beginners, and anyone moving from a pressurised basket to a standard portafilter setup.
Who may not need it: People using capsule machines, since capsules don’t require tamping.
To tamp espresso well, focus on three things: distribute the grounds, keep the tamper level, and repeat the same motion every time.
Treat pressure as a habit rather than a target, and change your grind size when you want to adjust flow. A few weeks of consistent practice will do more for your shots than any single piece of kit.
Best alternatives to learn next: grind size and dialling in, puck preparation techniques, and milk steaming for the next stage of your drinks.
Next Steps
- Read next: How to dial in espresso
- Learn brewing techniques: Espresso extraction explained
- Browse recipes: Home café drinks to make with your shots
- Best Espresso Tampers →
⚙️ Helpful Gear for Better Tamping
Want to upgrade your tamping game? These tools make a big difference in consistency:
🧲 Distributor Tool + Tamper Combo – Normcore Coffee Tamper on Amazon →
A dual-sided tool that first distributes, then tamps with a flat base. Great for beginners and pros alike.
🧼 Espresso Tamping Mat – Tamping Mats on Amazon →
Protects your counter and keeps your portafilter stable while tamping.