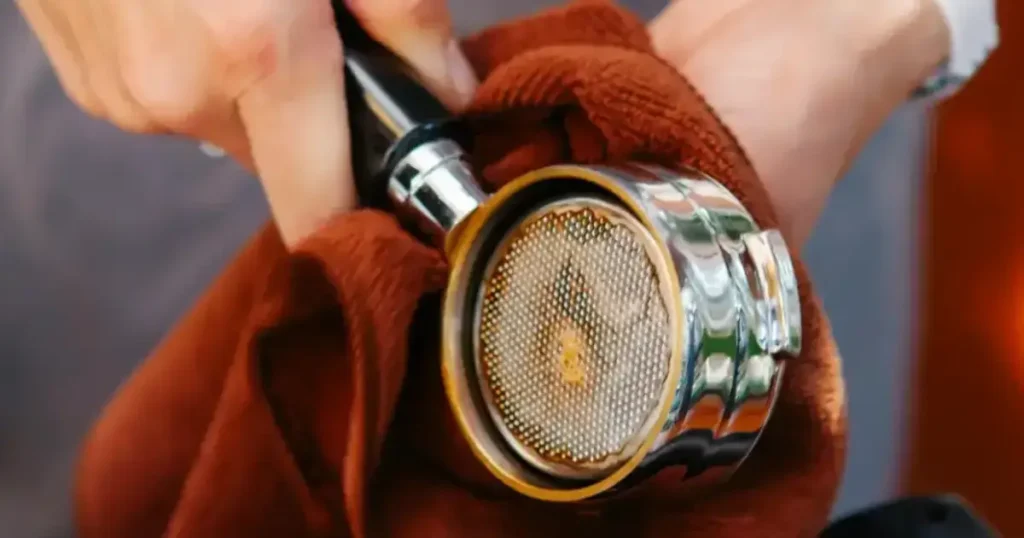
If your espresso shots taste sour in one sip and bitter in the next, or you keep seeing little jets of water spurting from the bottom of your portafilter, the problem is often not your beans or your machine.
- Quick Answer
- Key Takeaways
- Quick Comparison: Types of WDT Tools
- What Is a WDT Tool? (The Simple Definition)
- Why Do Espresso Grounds Clump in the First Place?
- How Does a WDT Tool Work?
- Do You Actually Need a WDT Tool?
- How to Use a WDT Tool: Step by Step
- What to Look for When Buying a WDT Tool
- WDT Tool vs Other Espresso Prep Tools
- WDT Tool vs Distribution Tool
- WDT Tool vs Tapping the Portafilter
- Can You Make a DIY WDT Tool?
- WDT Tool Maintenance and Ownership Tips
- Final Verdict: Is a WDT Tool Worth It?
- Frequently Asked Questions on What is a WDT tool
- What is a WDT tool used for?
- What does WDT stand for?
- Does a WDT tool really make better espresso?
- How long should you use a WDT tool?
- What size needles are best for a WDT tool?
- Can you use a WDT tool with Nespresso?
- Do I still need to tamp after using a WDT tool?
- Is a WDT tool better than a distribution tool?
- How much does a WDT tool cost?
- 🔗 Tamper Reviews:
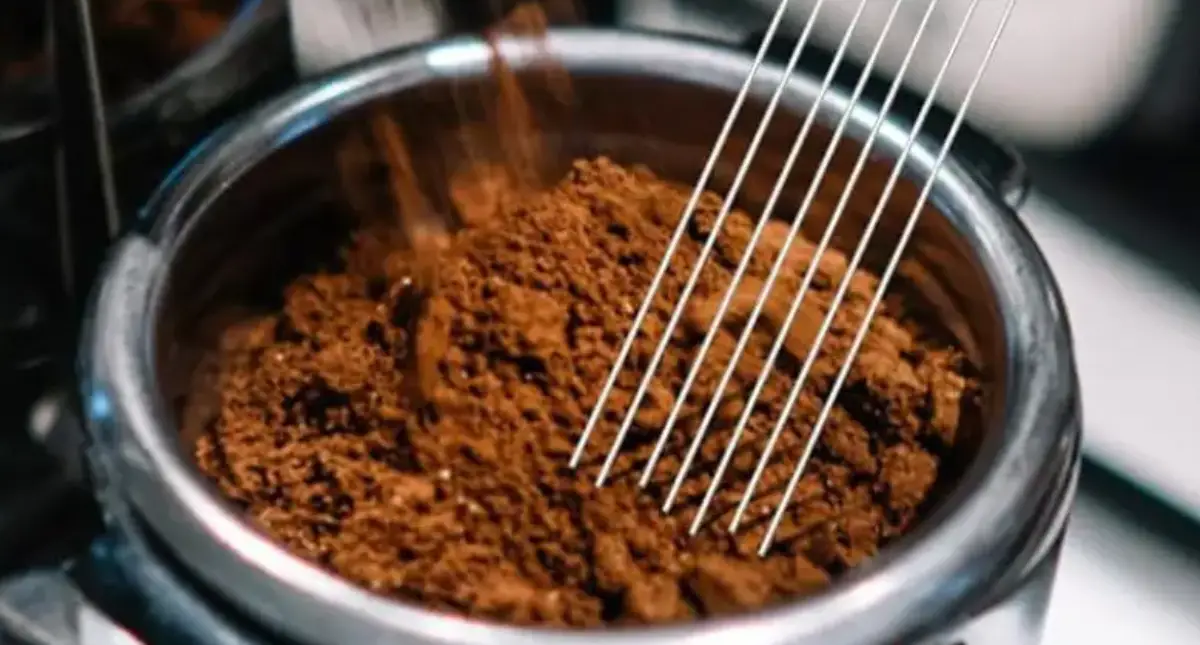
It’s clumpy, uneven coffee in the basket. So, what is a WDT tool? It’s a simple hand tool with very fine needles that you use to break up clumps and level your grounds before tamping, so water flows through the puck evenly and your shot extracts more consistently.
In this guide you’ll learn exactly what a WDT tool is, why it works, how to use one step by step, which features matter when buying, and the mistakes that stop people from getting the benefit.
👉 What is Espresso – Barista Quick and Bold Guide
Quick Answer
A WDT tool (Weiss Distribution Technique tool) is a handheld stirrer with thin needles, usually 0.3 to 0.4 mm, used to break up clumps in ground espresso and distribute it evenly in the portafilter before tamping.
This reduces channeling, improves extraction, and makes shots more repeatable. It’s one of the cheapest and most effective upgrades for home espresso.
👉 How To Dial In Espresso – Grind, Dose and Time Explained
Key Takeaways
- A WDT tool breaks up clumps and evens out grounds in the portafilter, so water flows through the coffee more uniformly.
- It’s named after the Weiss Distribution Technique, credited to John Weiss in the mid-2000s.
- It’s most useful with espresso, especially with fine grinds, static-prone grinders, and single-dose workflows.
- Most tools cost far less than a grinder or machine upgrade, making it a strong low-cost improvement.
- Needle thickness, handle comfort, and build quality matter more than fancy extras.
- It won’t fix stale beans, a poor grind setting, or a bad tamp, but it makes everything else easier to dial in.
Quick Comparison: Types of WDT Tools
| Type | Best For | Needle Count | Typical Feel | Price Range |
|---|---|---|---|---|
| DIY (acupuncture needle in a cork) | Budget experimenters | 1 | Basic, fiddly | Lowest |
| Basic multi-needle stirrer | Beginners | 3 to 7 | Light, simple | Low |
| Premium weighted or magnetic-stand tool | Enthusiasts | 5 to 10 | Solid, stable | Mid to high |
| Spring-loaded or auto tool | Convenience seekers | Varies | Quick, gimmicky for some | Mid |
Prices vary by retailer, so check current listings before you buy.
What Is a WDT Tool? (The Simple Definition)
A WDT tool is a small stirring instrument built around very thin needles set into a handle. After you grind coffee into your portafilter, you insert the needles and gently stir to break up clumps and spread the grounds evenly.
Think of it like fluffing rice with a fork before serving. You aren’t compressing anything. You’re loosening and levelling so the whole bed is uniform.
The technique is named after the Weiss Distribution Technique, credited to coffee enthusiast John Weiss, who shared his approach in the mid-2000s. His original method used a pin to stir the grounds, and the idea spread through home espresso communities because it was cheap and it worked.
Why It’s Called “Weiss Distribution Technique”
The “technique” is the stirring method, while the “tool” is simply the gadget that makes it easier. Early adopters used a straight pin or acupuncture needle pushed into a wine cork. Modern tools refine that idea with multiple needles, ergonomic handles, and stands.
What a WDT Tool Is Not
It isn’t a tamper, a leveller, or a distributor. Those tools compress or smooth the surface of the bed. A WDT tool works inside the bed, before compression, which is why many people use it alongside a good tamper.
Why Do Espresso Grounds Clump in the First Place?
Fine grounds are sticky. When beans are ground very finely, friction creates static, and oils and tiny particles (called fines) cause grounds to cling together. Some grinders produce more static than others, and dry, low-humidity conditions make it worse.
These clumps matter because they create dense and loose zones in the puck. Water takes the path of least resistance, so loose zones get over-extracted flow and dense zones get little. The result is uneven extraction.
The Problem With Channeling
Channeling happens when water punches through weak spots in the puck and rushes through, bypassing most of the coffee. Over-extracted channels taste bitter and harsh, while under-extracted areas taste sour and thin. You get both in the same cup.
You may spot channeling as spurting during the shot, a pale or patchy puck after brewing, or shots that taste inconsistent even with the same recipe.
☕ Frothy Fusion Tip
After pulling a shot, knock out the puck and look at it. Pits, cracks, or wet and dry patches are clues that your distribution needs work.
How Does a WDT Tool Work?
A WDT tool improves espresso by physically separating clumps and redistributing grounds into a more uniform bed. A more even bed offers consistent resistance to water, which helps reduce channeling and makes extraction more even.
The thin needles are the key. A thick tool would push grounds around and compact them in places, while fine needles slip through with minimal disturbance.
What Improvements Can You Expect?
Based on widely reported home barista experience, people commonly notice:
- More even flow during the shot
- Fewer visible channels and spurts
- Better repeatability from shot to shot
- Slightly easier dialing in
- Often a sweeter, more balanced cup
Results vary with your grinder, beans, and basket, and the effect is typically more noticeable with some grinders than others. I’d treat claims of dramatic flavor transformations with caution. A WDT tool improves consistency, which often reveals the true potential of your beans rather than adding something magical.
Do You Actually Need a WDT Tool?
Who Benefits Most
- Single-dose grinder users, since fine grounds from some grinders clump heavily.
- Beginners fighting inconsistent shots, because it removes one variable.
- Anyone with a static-prone grinder or low-humidity kitchen.
- Enthusiasts chasing repeatability.
Who Can Probably Skip It
- Nespresso and capsule users, because pods are pre-dosed and sealed, so there’s nothing to stir.
- Moka pot and drip coffee drinkers, who don’t rely on pressurised extraction.
- People using grinders that already produce very fluffy, clump-free grounds and who are happy with their shots.
Pros
- ✔ Very affordable compared with most espresso upgrades
- ✔ Reduces clumps and helps limit channeling
- ✔ Easy to learn in minutes
- ✔ Improves consistency
- ✔ Small, simple, and easy to store
Cons
- ✘ Adds 10 to 20 seconds to your routine
- ✘ Fine needles can bend if mishandled
- ✘ Won’t fix a wrong grind size or bad beans
- ✘ Benefits are subtle if your grounds were already even
How to Use a WDT Tool: Step by Step
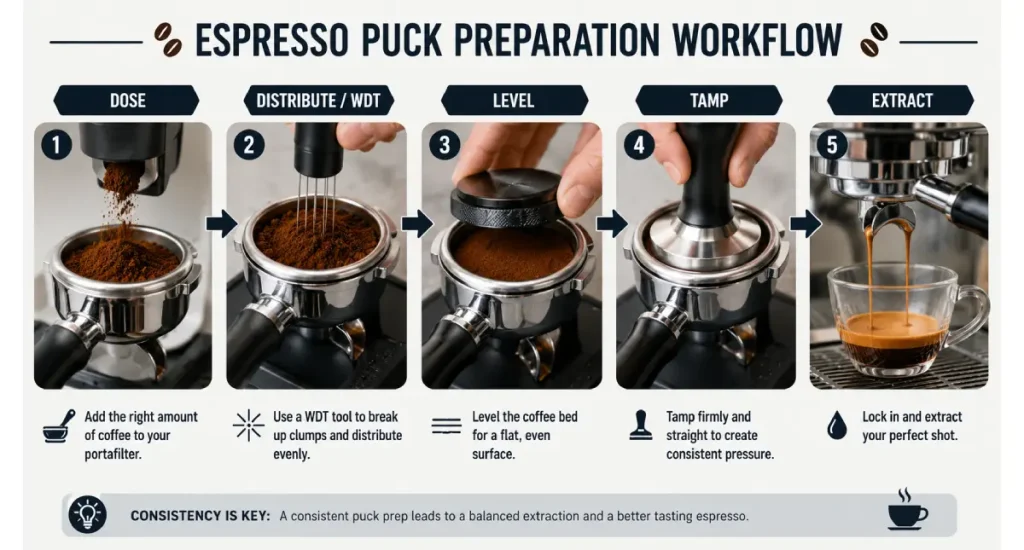
Step 1: Grind Into the Portafilter
Dose your grounds into the portafilter basket or a dosing cup. A funnel or dosing ring helps keep grounds from spilling while you work.
Step 2: Insert the Needles
Push the needles gently down toward the bottom of the basket. Go slowly to avoid pressing grounds into a dense layer.
Step 3: Stir in Small Circles
Stir with light, circular motions, then work back and forth across the basket. Aim for about 10 to 20 seconds. You’re loosening clumps, not whipping the coffee.
☕ Frothy Fusion Tip
Keep the needles moving through the full depth of the bed, including the edges. Clumps often hide near the basket wall.
Step 4: Level the Surface
Tap the side of the portafilter lightly, or gently sweep the top flat with the tool so the surface is even.
Step 5: Tamp Level and Brew
Tamp with even pressure, keeping the tamper level. Lock in and pull your shot right away.
Common Mistakes to Avoid
Avoid
❌ Stirring too aggressively and compacting grounds
❌ Using a bent or damaged needle that tears the bed unevenly
❌ Skipping the edges of the basket
❌ Expecting it to compensate for stale beans or a bad grind setting
❌ Over-stirring, which can bring fines to the bottom and create uneven density
👉 Best Espresso Tampers Reviewed
What to Look for When Buying a WDT Tool
Here’s what matters when choosing one.
Needle Thickness
Finer needles, commonly around 0.3 to 0.4 mm, disturb the bed less. Very thick needles can create channels of their own.
Number of Needles
More needles cover more area per pass, but there’s a tradeoff: too many can feel crowded in a smaller basket. A moderate count is often a good balance for beginners.
Handle and Grip
A comfortable, weighted handle improves control. A handle that’s too light or slippery makes the stirring feel clumsy.
Build Quality
Look for needles that are firmly anchored and don’t wobble. Cheaper tools sometimes bend easily or shed needles.
Stand or Storage
A stand or cap protects the needles and keeps them from bending in a drawer. This is a small detail that extends the life of the tool.
Warranty and Brand Reputation
Check whether the seller offers replacements for bent needles, and read independent reviews rather than relying only on marketing copy.
Budget
You don’t need to spend much. A mid-range tool with a good handle and sturdy needles is usually plenty for home use.
A note on transparency: this guide draws on published information and widely shared home barista experience rather than my own head-to-head lab testing.
👉 How to Tamp Espresso Like a Barista
WDT Tool vs Other Espresso Prep Tools
| Tool | What It Does | Works Best When | Replaces a WDT Tool? |
|---|---|---|---|
| WDT tool | Breaks clumps, distributes grounds | Grounds are clumpy | n/a |
| Leveller / distributor | Smooths the top surface | Bed is uneven on top | No |
| Tamper | Compresses the puck | Always | No |
| Puck screen | Spreads water over the puck | Reducing disturbance | No |
| Ross Droplet Technique (RDT) | Reduces static before grinding | Static is the issue | No (complementary) |
These tools solve different problems, so they work best together rather than as substitutes.
WDT Tool vs Distribution Tool
A distribution tool levels the surface, but it doesn’t reliably break up clumps deeper in the bed. Many enthusiasts use a WDT tool first, then a leveller or a careful tamp.
WDT Tool vs Tapping the Portafilter
Tapping settles grounds but can actually increase density at the bottom and leave clumps intact. A WDT tool addresses the clumps directly.
Can You Make a DIY WDT Tool?
Yes. The classic DIY version is an acupuncture needle or very fine pin pushed into a wine cork. It works for testing the technique cheaply, though handling is less comfortable, and you’ll need to take care with the sharp end. If you decide you like the method, a purpose-built tool is a small step up in comfort and safety.
WDT Tool Maintenance and Ownership Tips
- Wipe needles clean after each use to avoid buildup of oils and fines.
- Don’t toss it in a drawer. Use a cap or stand to protect the needles.
- Replace any needle that’s visibly bent.
- Keep it dry to avoid rust on cheaper steel needles.
Final Verdict: Is a WDT Tool Worth It?
For most home espresso drinkers, yes. If you’re asking what a WDT tool is because your shots feel inconsistent, it’s one of the most affordable ways to improve distribution and reduce channeling, and it takes seconds to use.
Best for: Beginners, single-dose grinder owners, and anyone chasing repeatable shots.
Who should skip it: Capsule machine users, and people already getting clean, even shots.
Best alternatives or add-ons: A leveller or distributor, a puck screen, and a good tamper. These complement a WDT tool rather than replace it.
Now that you know what a WDT tool is and how to use one, your next step is simple: try it for a week, keep your dose and grind constant, and compare your pucks and your taste notes.
👉 Want our top picks? Check out our Best WDT Tools for Espresso roundup.
Frequently Asked Questions on What is a WDT tool
What is a WDT tool used for?
A WDT tool is used to break up clumps in ground espresso and spread the grounds evenly in the portafilter before tamping. Even distribution helps water flow through the coffee uniformly, which reduces channeling and improves extraction consistency. It’s used mainly for espresso, particularly with fine grinds, and it takes only 10 to 20 seconds per shot.
What does WDT stand for?
WDT stands for Weiss Distribution Technique. It’s named after John Weiss, who is credited with popularising the approach of stirring espresso grounds with a fine needle to improve distribution in the mid-2000s. The term now refers both to the technique and to the handheld tools designed to perform it.
Does a WDT tool really make better espresso?
It often improves consistency, which can make espresso taste more balanced and sweeter. By reducing clumps and channeling, it helps extract more evenly. The effect varies by grinder, beans, and basket, so some people see big changes and others see subtle ones. It won’t fix stale beans or a wrong grind setting.
How long should you use a WDT tool?
Most people stir for about 10 to 20 seconds. The goal is to loosen clumps and level the bed, not to stir endlessly. Over-stirring can compact fines at the bottom of the basket and create uneven density, so keep your movements light and finish once the grounds look fluffy and even.
What size needles are best for a WDT tool?
Needles around 0.3 to 0.4 mm are widely used because they disturb the bed minimally while still breaking up clumps. Thicker needles can create their own channels in the puck. Choose a size suited to your basket, and make sure the needles are sturdy enough not to bend with normal use.
Can you use a WDT tool with Nespresso?
No, you generally can’t, and you don’t need to. Nespresso capsules are sealed and pre-dosed, so there are no loose grounds to distribute. A WDT tool is designed for ground espresso in a portafilter, so it’s relevant for manual and semi-automatic espresso machines, not capsule systems.
Do I still need to tamp after using a WDT tool?
Yes. A WDT tool distributes grounds, but it doesn’t compress them. You still need to tamp with level, consistent pressure to form a puck that resists water evenly. Think of WDT as the prep step before tamping, not a substitute for it.
Is a WDT tool better than a distribution tool?
They do different jobs. A WDT tool breaks up clumps within the bed, while a distribution tool levels the surface. Many enthusiasts use both: WDT first to fluff and loosen, then a leveller or tamp to finish. If you can only buy one, consider whether clumping or an uneven surface is your main problem.
How much does a WDT tool cost?
Prices range from very cheap basic stirrers to higher-end weighted tools with stands. You don’t need to spend much, since a mid-range tool with sturdy needles and a comfortable handle is plenty for most home users. Check current retailer listings, as prices change and vary by region.
🔗 Tamper Reviews:
👉 Matow WDT Tool: Affordable and Effective Espresso Distribution
👉 Crema Coffee WDT Tool – Smooth, Professional Espresso Prep
👉 Force Tamper – What It Is
👉 Normcore V4 Tamper Review
👉 Espro Tamper – Perfect Pressure Every Time